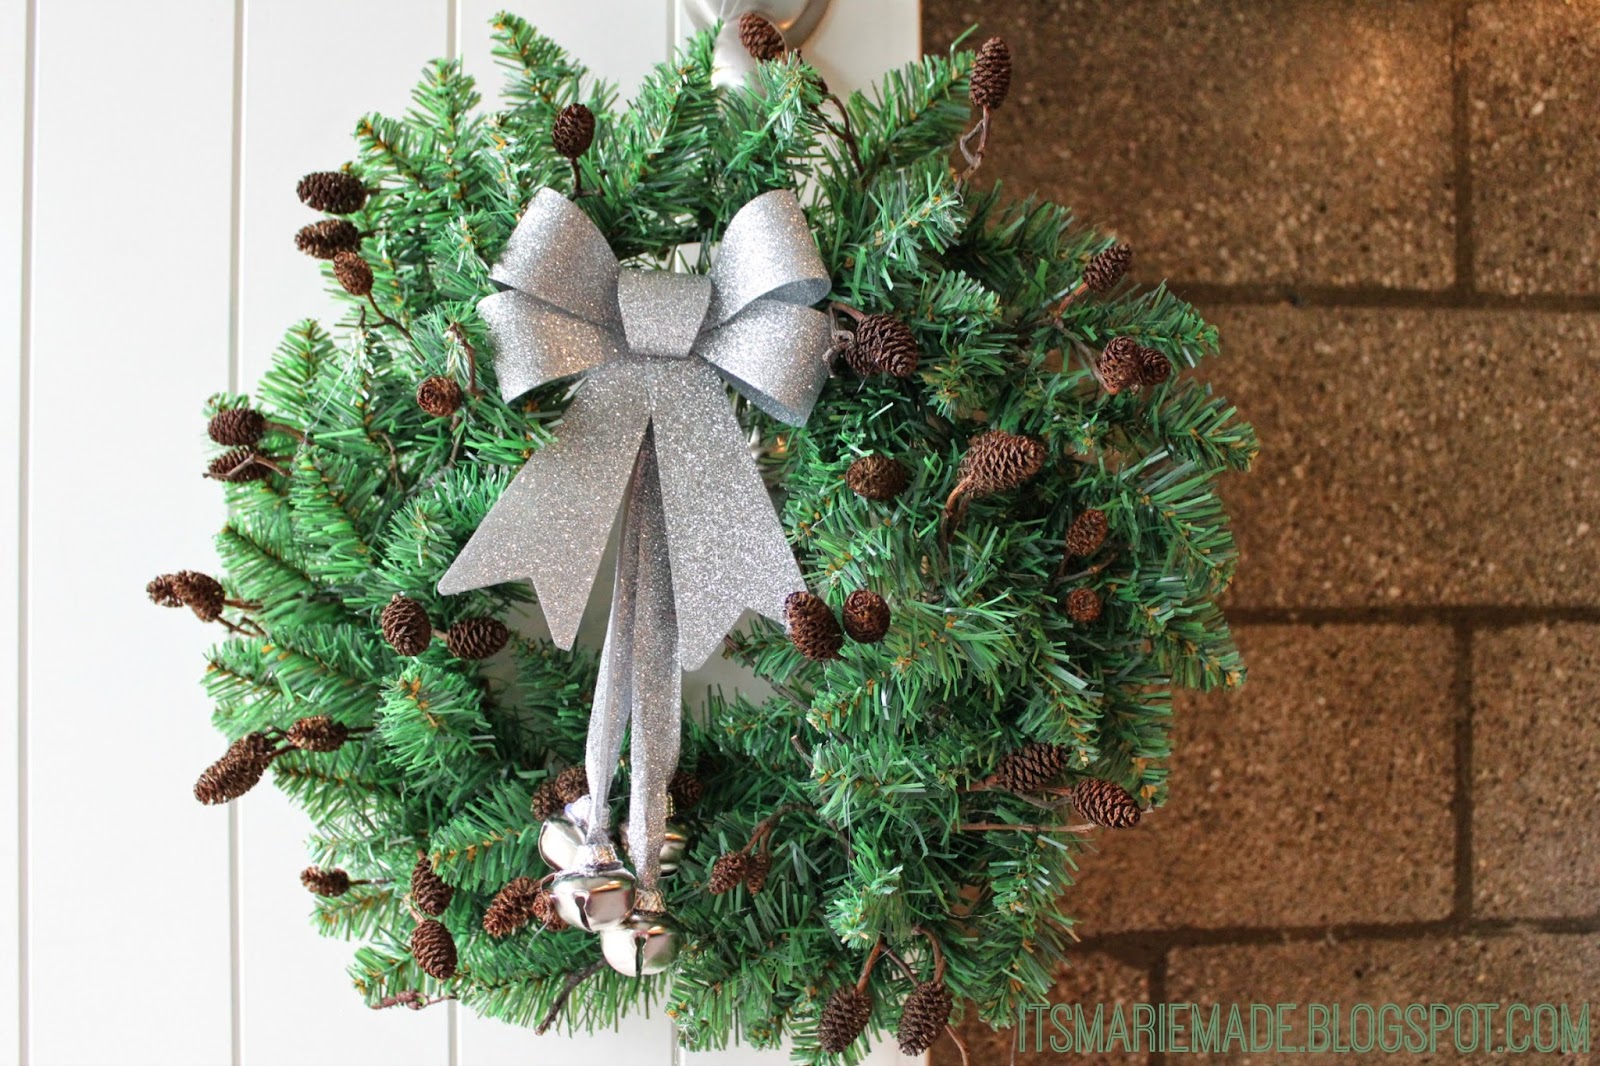
Now that the Thorndon Fair is over, I feel like I can join the land of the living! I also want to do anything but yarn crafts! I've have a few ideas for Christmas projects that I wanted to do this year, but they've been on the back burner until the fair was over. I am hurriedly trying to do something so I can enjoy them while we are still in the Christmas season. This particular project has to be one of the quickest and easiest I've done all year!
I've always wanted to hang a wreath on my front door. Something about a door wreath is super Christmassy to me! While I admit I probably didn't look very hard, over the years I hadn't found one that I liked enough to buy. I also thought I could probably easily make my own, and I was right! Armed with my glue gun and a few other bits and pieces I literally made this wreath in less than half an hour! I chose natural neutral colours to go with the green and silver theme that we have going on in our house.
The cute mini pinecones I collected from a park right by our house. I think they are from a Copper Birch tree which was dropping the cones earlier in spring. They were so small and cute I knew I would be able to use them in some crafty way! The wreath was on sale at The Warehouse for $5. To be honest, it didn't look very promising before I started adding the other stuff. It's a very plain basic fake pine, but it is attached to a very sturdy wire frame which helped secure the bow. The bow and bells were attached to a door hanger so it could be used by itself. I removed the hanger so I could use the other pieces the way I wanted. This was also another bargain buy at $1.70 (!) from Pete's Emporium. If you're a Wellington local and haven't been to Pete's Emporium, you really need to head to Porirua
and check it out!
D.I.Y Easy Christmas Door Wreath
Materials:
- Wreath
- Mini Pinecones
- Bow
- Ribbons with bells
If you're not sure how your elements will look when finished, do a mock up by placing the pinecones around the wreath without gluing them first. This way you can easily change the layout. Make sure to leave a little space at the centre of the top of the wreath to attach the ribbon. When you are happy with the way the cones are placed, you can either remove them all and begin gluing, or take them out one by one and glue.
I glued the twig ends of the pinecones before quickly pressing them down into the wreath. Hot glue sets almost instantly so you do need to work quickly.
Next I attached the ribbon bells to the metal frame of the with a simple loop knot. That is, I pushed the bell ends through the folded ribbon end over the frame, and pulled tight to secure.
The bow I was using had a twist tie at the back so I used this to attach the bow to the wreath frame also. It made a tight and secure hold but I also used a little dab of glue for extra safety.
And voila- a pretty (simple) wreath for the door! To hang the wreath I used a small picture hook hanger to attach to the front door.
What easy Christmas crafts are you doing this year?
(And very pleased to be linking in with Show & Tell at Leonie's blog this week after a hiatus!)
(And very pleased to be linking in with Show & Tell at Leonie's blog this week after a hiatus!)


Beauteous! I love how you put it all together. We just have cobwebs on our front door - and a few white dots hat are hanging on for dear life from a birthday party in September.
ReplyDeleteThanks for stopping by! I am hoping this may last longer than one Christmas, time will tell :)
Deletehow creative and festive, wish I had that creativity and patience. Happy Saturday Sharefest
ReplyDeleteThanks so much for stopping by and your lovely comment. Much appreciated :)
DeleteVery pretty,it's hard to believe how expensive some of these wreaths can get in the store. I love seeing an affordable and easy to make version. I love the silver bow. Thank you for sharing,
ReplyDeleteThanks for your comment :) It always feels very satisfying to make something you know would cost at least twice as much in a store! Thanks for visiting
DeleteI love how natural and beautiful this is! Nice to meet you at SITS!
ReplyDeleteExactly the look I was going for-- natural and unfussy! Thanks for visiting :)
DeleteVery cute! I love that you were able to find the pinecones like that! I just finished up making a Christmas tree topiary, and I have a few other projects in mind for my leftover boxwood. Visiting from SITS today!
ReplyDeleteI knew those little cones would be useful for something. I will be sure to see what you have been up to, always great to see other ideas. Thanks for visiting :)
DeleteI'm pinning this. There is something I love about pine cones, maybe it's because they remind me of fall / Christmas. I'm pinning this, you did a great job. I'm stopping by from SITS & I hope your having a great day.
ReplyDeletePine cones as very festive aren't they? Thanks for your comment and visiting :)
Delete